Using your SSL.com account portal, it is possible to pre-validate a domain name before ordering certificates. A domain that is validated with ACME may also be used. Domain validation is scoped to teams, so any team member can order certificates for a pre-validated domain.
Step 1: Add a New Domain
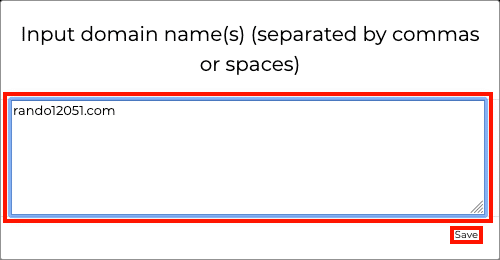
- Log into your SSL.com account and go to the Domains tab

- Click the Add button.
- A dialog box will appear. Type the domain name you wish to add in the text field, then click Save. Note: you may enter more than one domain, separated by commas or spaces.

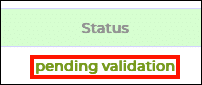
- The new domain will now be shown as Pending Validation in the list of domains.


Step 2: Domain Validation
SSL.com supports three methods of domain validation (DV):
Note that the HTTP CSR Hash and CNAME CSR Hash methods require a certificate signing request (CSR), while the Email Challenge Response method does not.
Email Challenge Response Method
- webmaster@
- hostmaster@
- postmaster@
- administrator@
- admin@
- Domain contacts (domain name registrant, technical contact, or administrative contact) listed in the base domain’s WHOIS record.
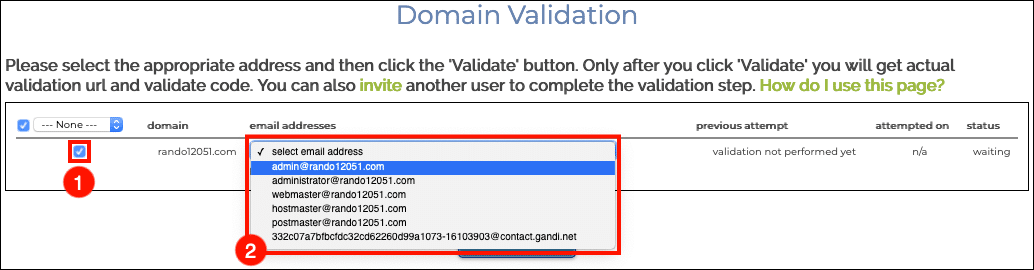
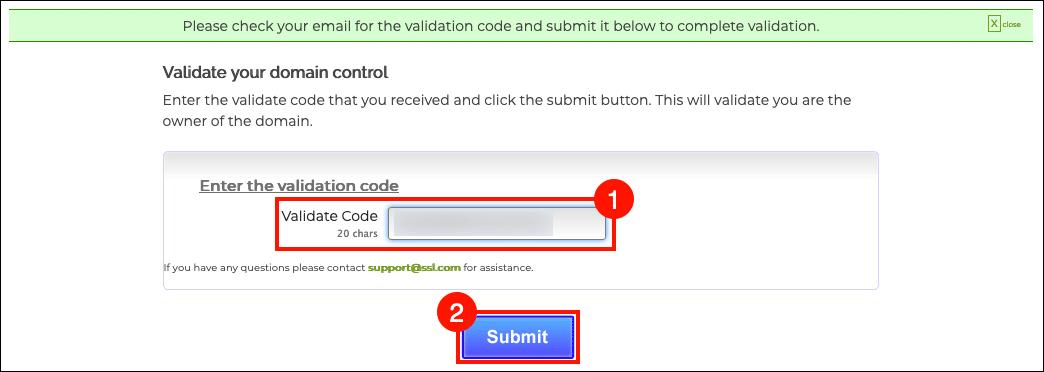
- Check the box next to the domain name you wish to validate, and then click the validate by email code button.Email challenge response is the default DV method, so you can also just click the pending validation link in the Status column.

- On the page that appears, check the checkbox next to the domain, then choose the email address for validation from the drop-down menu.

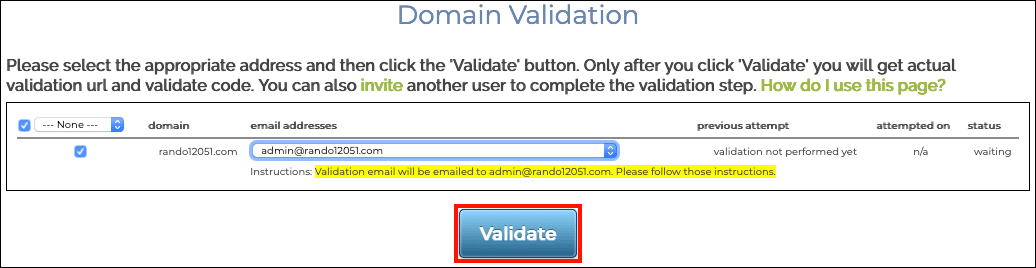
- Click the Validate button.

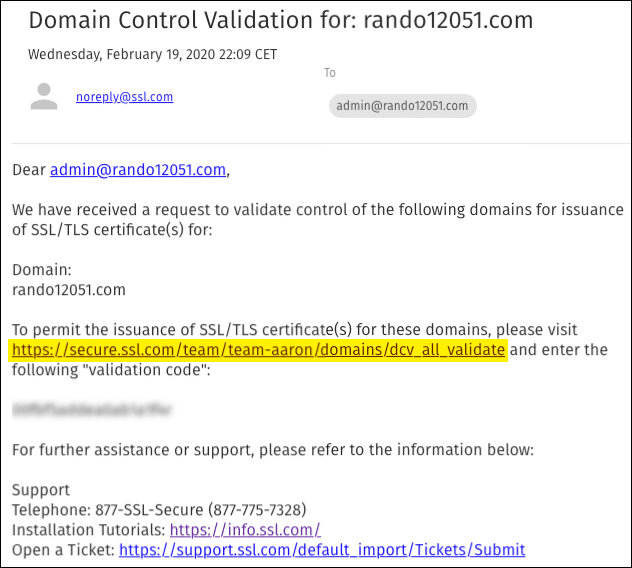
- A web page with a form will open. Check your email address for a new message with a 20-character domain validation code. Enter the code into the form field and click the Submit button.

- If you need to come back and finish validation later, you can also click the link in the validation email to return to the validation form.


HTTP CSR Hash Method
- Begin by clicking the CSRs Manager link.

- A page with a CSR generation form will open. On this page, you can either generate a new CSR or submit your own. If you are submitting your own CSR, please skip ahead to step 5.

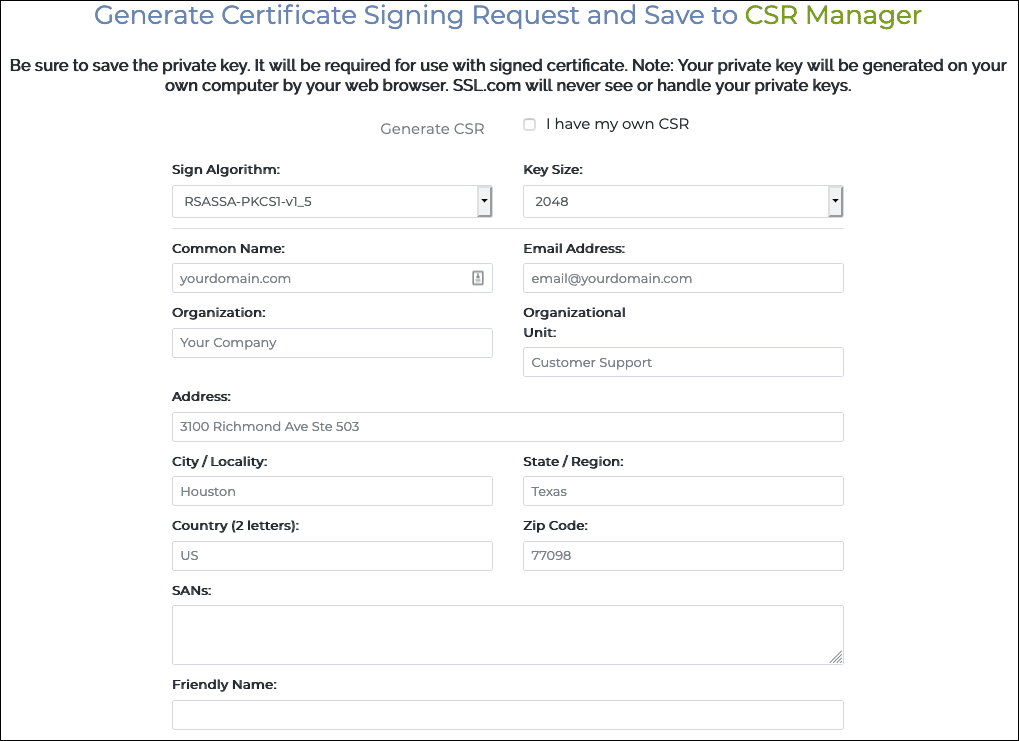
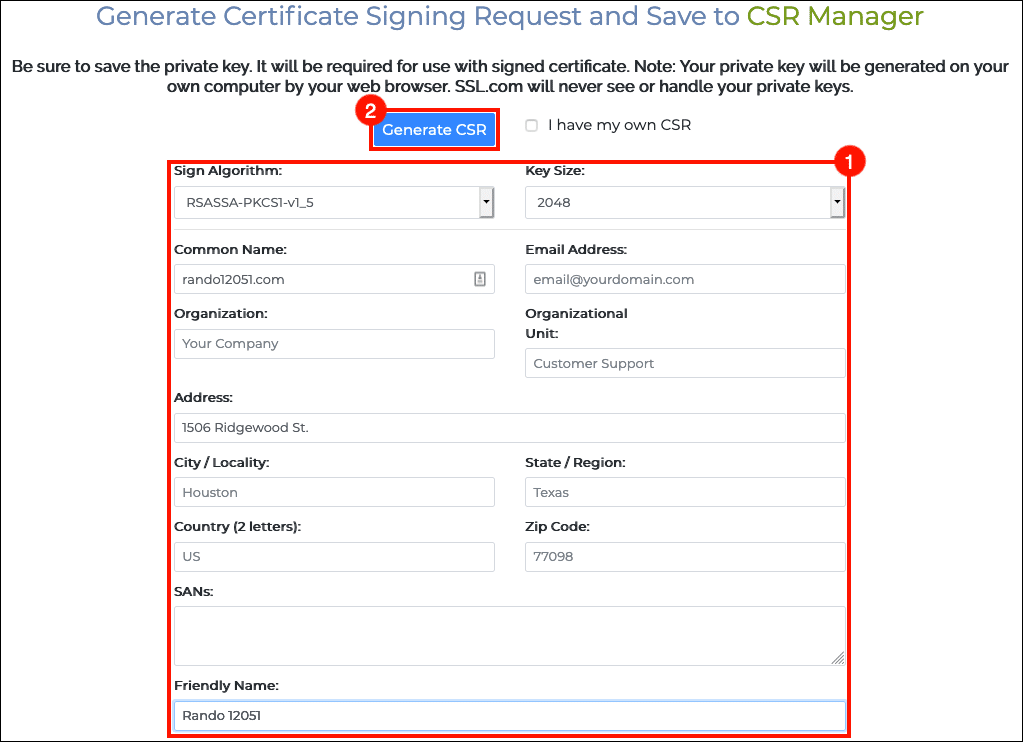
- If you want to generate a new CSR, enter the domain name you wish to validate in the Common Name field. You can specify the signing algorithm and key size with the drop-down menus at the top of the form. You can also create a name for your own reference in the Friendly Name field at the bottom of the form. The other form fields (organization information and a list of SANs) are not required for domain validation, but you may fill them out if you wish to re-use the CSR for ordering OV and/or EV certificates. When you are finished, click the Generate CSR button (the button will appear after you enter a valid domain name).

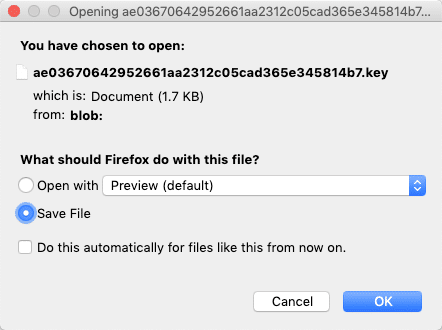
- A system dialog box will appear, prompting you to save a file with your private key. Be sure to save this file in a secure location and do not lose it. Anyone in possession of your private key has effective control of your website’s identity.Note: your private key will be generated on your own computer, in your browser. SSL.com will never see or handle your private keys, and we cannot recover a lost private key for you.

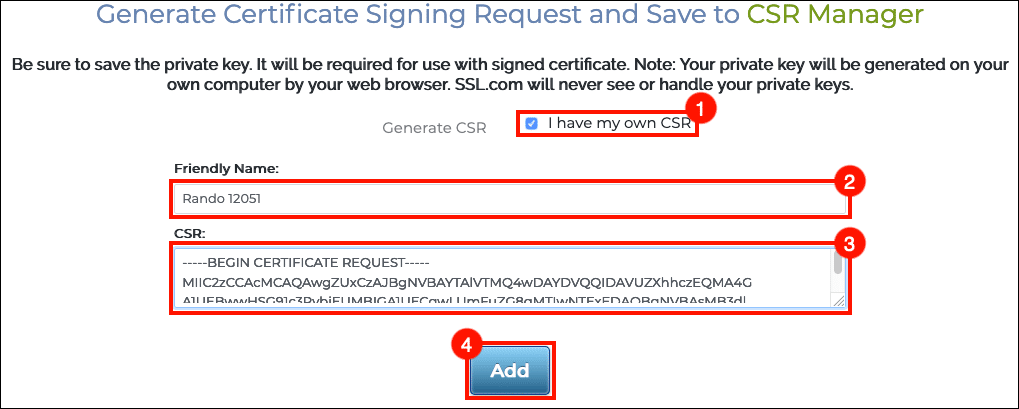
- If you have already generated a CSR on your own computer that you would like to submit, check the box labeled I have my own CSR, enter a Friendly Name (if desired), paste your CSR into the CSR field, and click the Add button. When pasting your CSR, make sure to include the lines
-----BEGIN CERTIFICATE REQUEST-----and-----END CERTIFICATE REQUEST-----.
- After generating or adding your CSR, you will see an alert banner saying that the CSR has been successfully added, and your CSR will appear in the CSR Manager list.
- Return to the Domains tab.
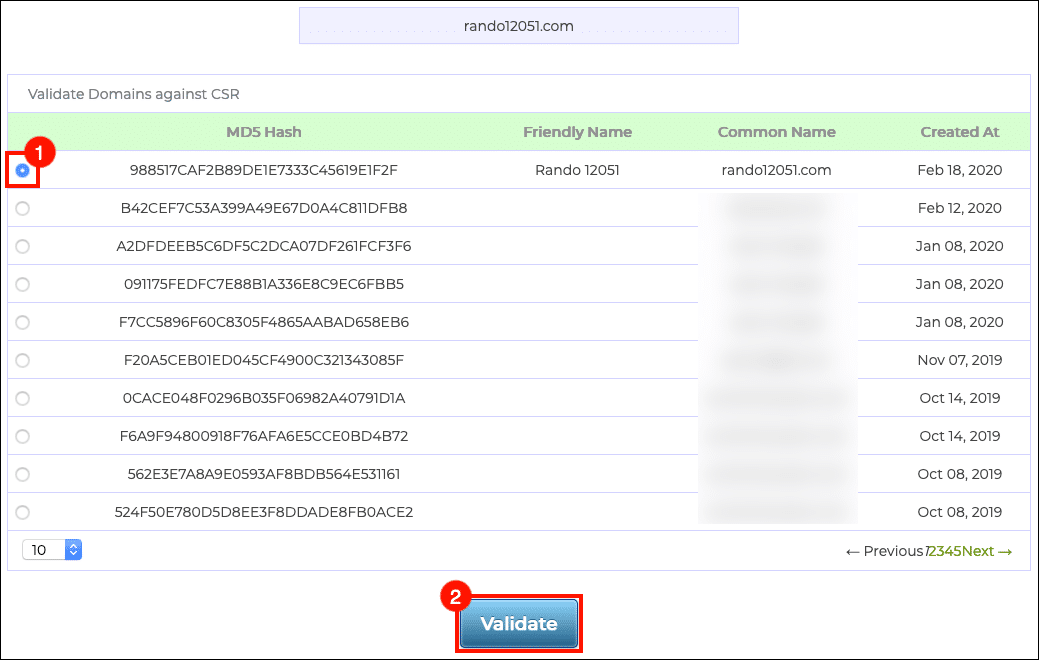
- Check the box next to the domain name you wish to validate, and then click the validate by cname/file upload button.
- A new page will appear. Select the CSR you want to use for validation, then click the Validate button.

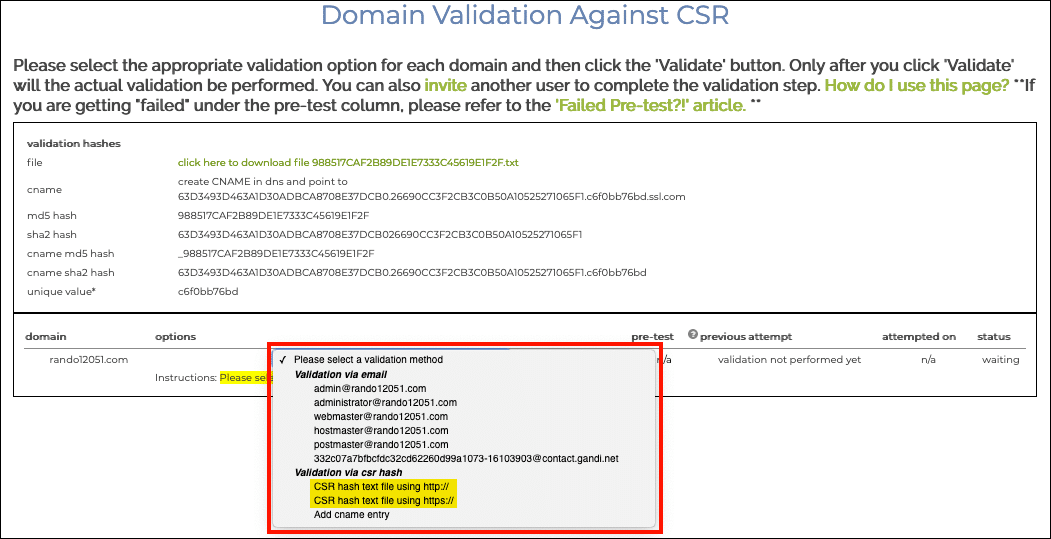
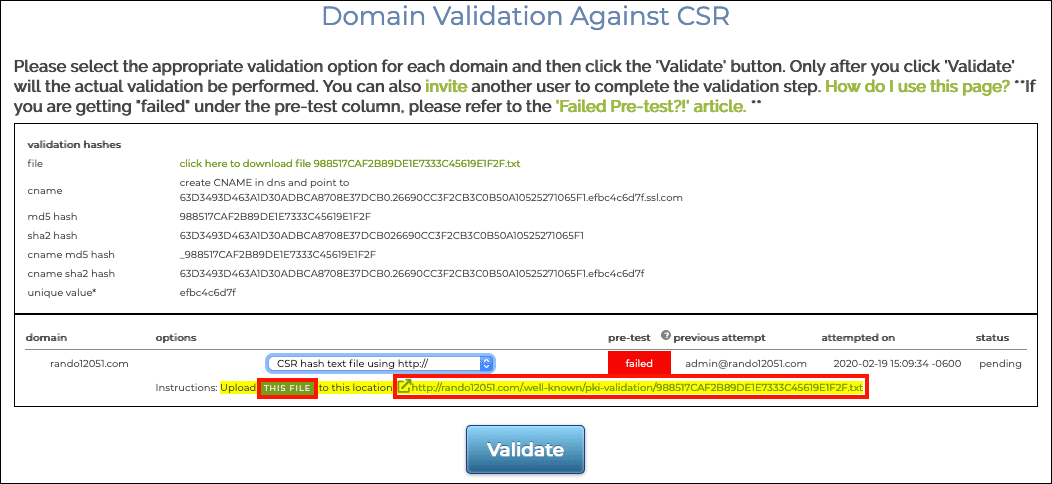
- On the page that appears, select
CSR hash text file using http://orCSR hash text file using https://from the drop-down menu, depending on which protocol your server is currently configured to support.
- In this case, we’ve selected
CSR hash text file using http://. Click the small button labeled THIS FILE to download the CSR hash text file, then upload it to your web server in a place where it can be accessed via the URL shown to the right. (You will need to create the/.well-known/pki-validation/directory on your web server if it doesn’t already exist.) The default status of the pre-test is “FAILED.” Don’t Panic.
 - When you have uploaded the file, click the Validate button.

- After a successful validation, the pre-test value will be shown as passed.


CNAME CSR Hash Method
- Begin by clicking the CSRs Manager link.
- A page with a CSR generation form will open. On this page, you can either generate a new CSR or submit your own. If you are submitting your own CSR, please skip ahead to step 5.
- If you want to generate a new CSR, enter the domain name you wish to validate in the Common Name field. You can specify the signing algorithm and key size with the drop-down menus at the top of the form. You can also create a name for your own reference in the Friendly Name field at the bottom of the form. The other form fields (organization information and a list of SANs) are not required for domain validation, but you may fill them out if you wish to re-use the CSR for ordering OV and/or EV certificates. When you are finished, click the Generate CSR button (the button will appear after you enter a valid domain name).
- A system dialog box will appear, prompting you to save a file with your private key. Be sure to save this file in a secure location and do not lose it. Anyone in possession of your private key has effective control of your website’s identity.Note: your private key will be generated on your own computer, in your browser. SSL.com will never see or handle your private keys, and we cannot recover a lost private key for you.
- If you have already generated a CSR on your own computer that you would like to submit, check the box labeled I have my own CSR, enter a Friendly Name (if desired), paste your CSR into the CSR field, and click the Add button. When pasting your CSR, make sure to include the lines
-----BEGIN CERTIFICATE REQUEST-----and-----END CERTIFICATE REQUEST-----. - After generating or adding your CSR, you will see an alert banner saying that the CSR has been successfully added, and your CSR will appear in the CSR Manager list.
- Return to the Domains tab.
- Check the box next to the domain name you wish to validate, and then click the validate by cname/file upload button.
- A new page will appear. Select the CSR you want to use for validation, then click the Validate button.
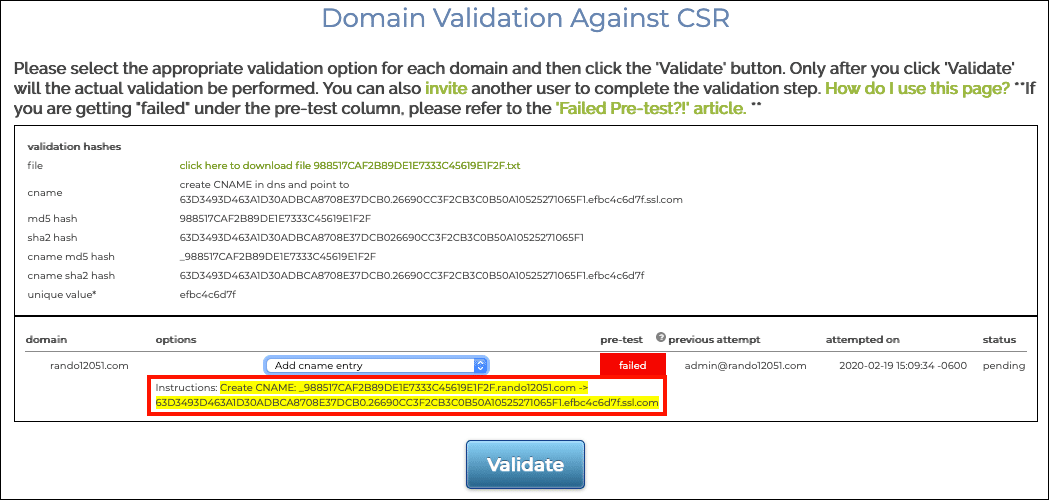
- On the page that appears, select
add cname entryfrom the drop-down menu.
- Use the highlighted instructions and values to create a CNAME entry in your domain’s DNS record. Consult your web host or DNS provider for instructions on creating the CNAME entry. In this case, the completed DNS entry would look like this (please notice the underscore at the beginning of the entry, which is required):
_988517CAF2B89DE1E7333C45619E1F2F.rando12051.com
14400 IN CNAME
63D3493D463A1D30ADBCA8708E37DCB0.26690CC3F2CB3C0B50A10525271065F1.efbc4c6d7f.ssl.com
 The default status of the pre-test is “FAILED.” Don’t Panic.
 - When you are finished creating the CNAME entry, click the Validate button. Note that it may take a few hours (and sometimes up to 48 hours) for the DNS change to be propagated globally—you can use whatsmydns.net to check its status before attempting to validate.

- After a successful validation, the pre-test value will be shown as passed.


Finishing Up
If everything has gone correctly, your domain is now pre-validated and team members can order certificates for any host in the domain (e.g. www.example.com, info.example.com, etc.). The Revalidation column will also show how many days are remaining before you must re-validate the domain.
![]()