

Time needed: 1 hour
These instructions will show you how to generate a certificate signing request (CSR) and install a certificate from SSL.com in Microsoft Azure Key Vault. You will need to create a Key Vault in your Azure account before using this how-to.
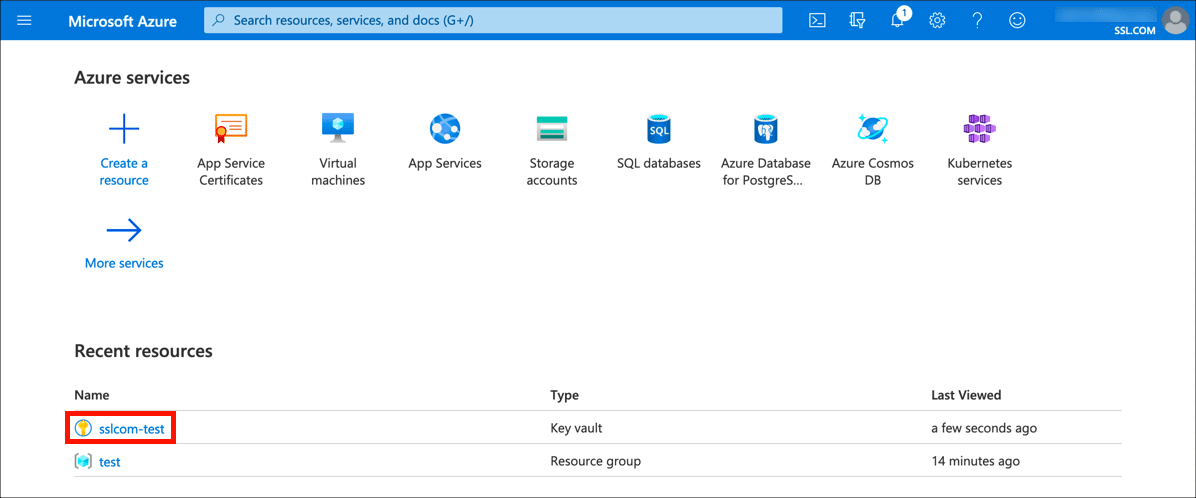
- Select Key Vault.
Sign into the Azure portal and select the key vault where you wish to install your certificate.
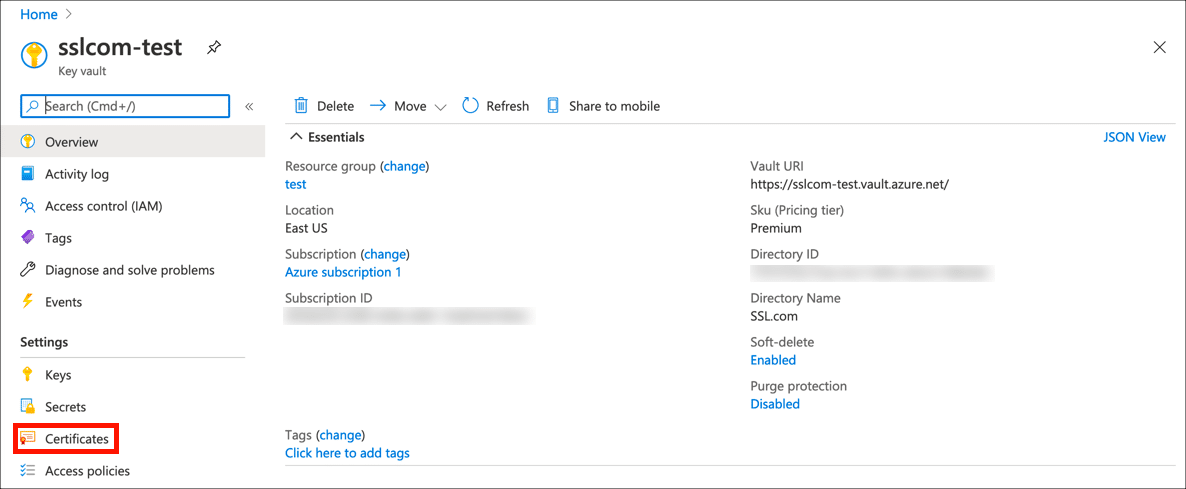
- Open certificate settings.
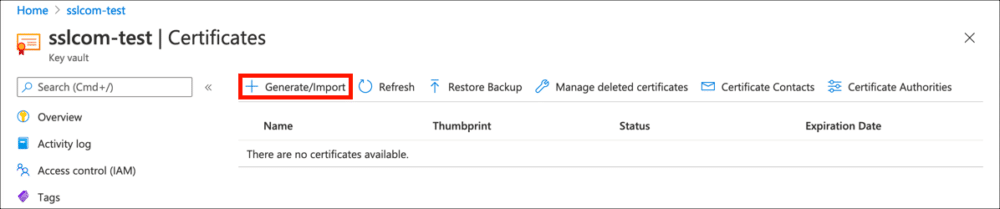
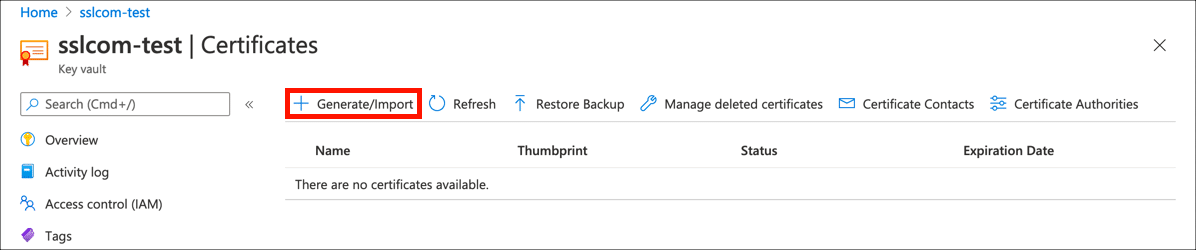
Select Certificates in the right-hand Settings menu.
- Begin CSR generation.
Click the Generate/Import button to open the Create a certificate window.
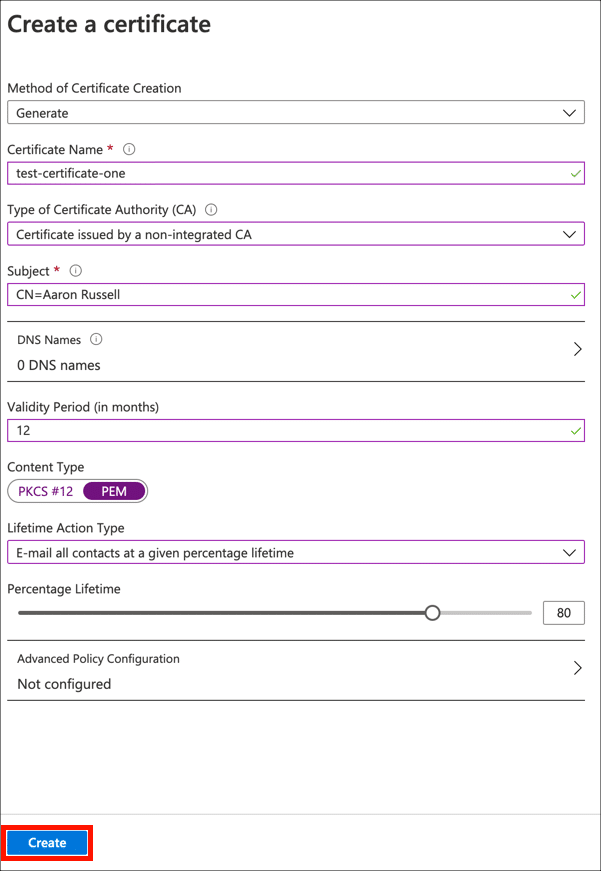
- Enter certificate details.
Enter or select the following details in the Create a certificate form fields:
• Method of Certificate Creation: selectGenerate
• Certificate Name: Enter a unique name for your certificate
• Type of Certificate Authority (CA): SelectCertificate issued by a non-integrated CA
• Subject: Enter the X.500 Distinguished Name for your certificate. For an SSL/TLS certificate this would be something likeCN=example.com. For OV code signing, you can enter something likeCN=Firstname Lastname,OU=Operations,O=Company Name,C=US. For individual validation, you can enter your name as the common name, e.g.CN=Firstname Lastname.
• DNS Names: Add any additional domain names that should be added to an SSL/TLS certificate (e.g.secure.example.com, etc.).
• Validity Period: You can leave this at the default setting of 12 months. For code signing certificates with longer validity periods, your issued certificate will be based on your order, not the CSR.
• Content Type: selectPEM
• Lifetime Action Type: Here you can configure Azure to send email alerts at a certain percentage of certificate lifetime or days before expiry.

- Advanced Policy Configuration
Click Advanced Policy Configuration to set the key size, type, and policies for key reuse and exportability. If you want to generate an HSM-protected key, set Exportable Private Key to N
oand chooseRSA-HSMorEC-HSM. For certificates issued by SSL.com, you can leave Extended Key Usages (EKUs) and X.509 Key Usage Flags and Enable Certificate Transparency at their default values, and Certificate Type blank. When you are finished setting the Advanced Policy Configuration, click the OK button.

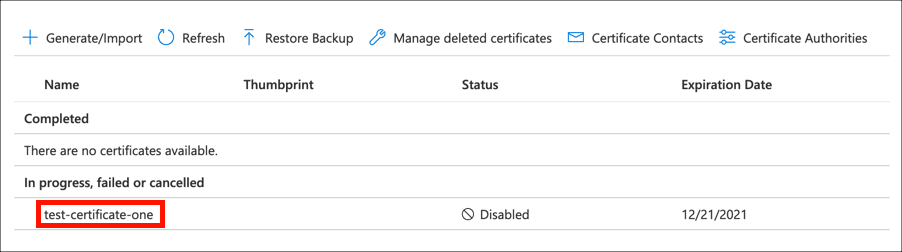
- Generate CSR.
Click the Create button to generate your new key pair and CSR.
- Select certificate.
Locate your certificate in the list of in progress, failed or cancelled certificates and click it.
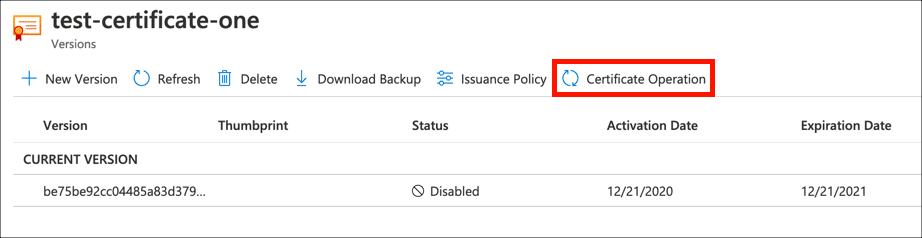
- Click Certificate Operation.
Click the Certificate Operation button.
- Download CSR.
Click the Download CSR button and download your CSR file.
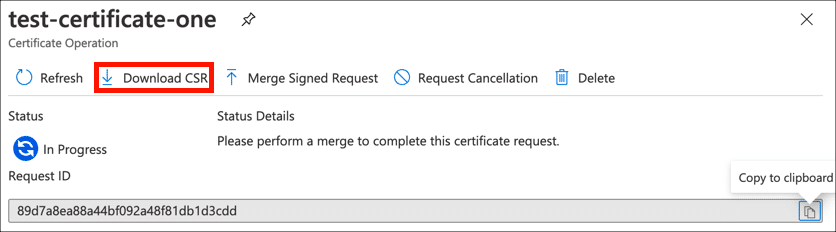
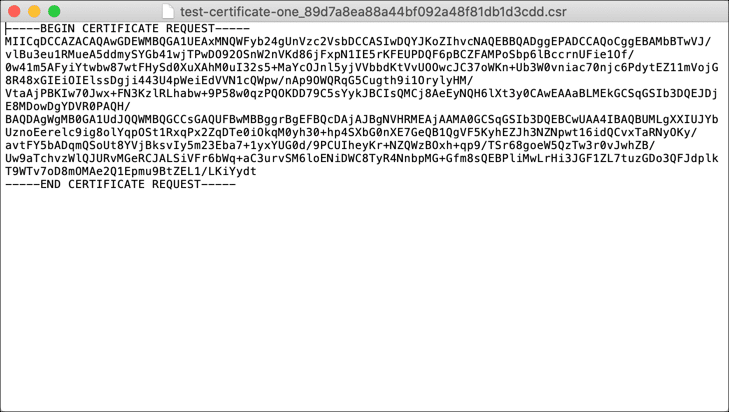
- Open CSR.
Open your CSR in a text editor so you can copy and paste it when ordering.
- Order and retrieve certificate.
Order a certificate from SSL.com (or reprocess an existing order). When ordering or generating your certificate, use the CSR you downloaded from Azure.

- Select certificate in Key Vault.
Return to Key Vault and select your certificate’s name in the Certificates settings.
- Click Certificate Operation.
Click the Certificate Operation button.
- Merge Signed Request.
Click the Merge Signed Request button and navigate to the certificate you downloaded from SSL.com.
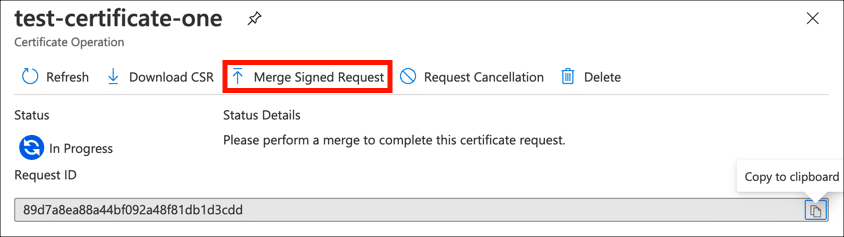
- Certificate merged.
You should see notifications that your certificate request has been successfully merged.

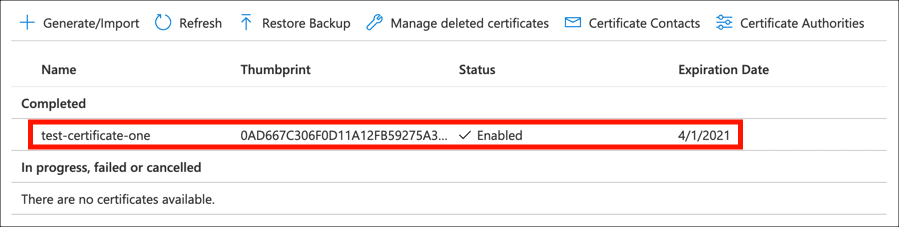
- Finished!
Your signed certificate is now installed in Key Vault and ready to use.


Next Steps
For more info on installing your certificate, read here. For help binding your certificate, read here.