

How to Install an S/MIME Certificate and Send Secure Email with Outlook on Windows 10

Time needed: 30 minutes
These instructions detail how to install an S/MIME certificate and send secure email messages with Microsoft Outlook on Windows PCs. Testing was done in Outlook version 1902 on Windows 10 Enterprise, but Outlook has natively supported S/MIME for many years. Please check with Microsoft’s Outlook Support about any issues or specific instructions concerning earlier versions of Outlook and/or Windows.
- Download your certificate.
Download a PKCS#12 file with your certificate from your SSL.com account by clicking the link supplied in your Certificate Activation Link email and following the on-screen instructions in your web browser. You will be prompted to create a password before downloading the file. (Keep this password secure – you will need it later.) Make sure to keep track of where you saved your PKCS#12 file, and do not lose it. If you lose your private key, you will be unable to read messages encrypted with your public key.
Note: when downloading your certificate it is possible to choose between the RSA and ECDSA algorithms via the Algorithm drop-down menu. However, ECDSA keys cannot be used for email encryption, so it’s best to leave this set to RSA. - Open Outlook Options.
In Outlook, select File from the main menu, then click Options.
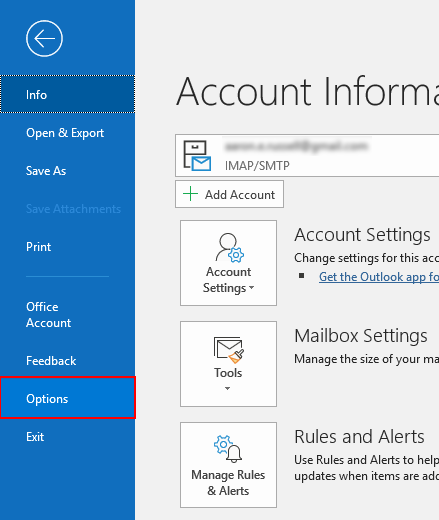
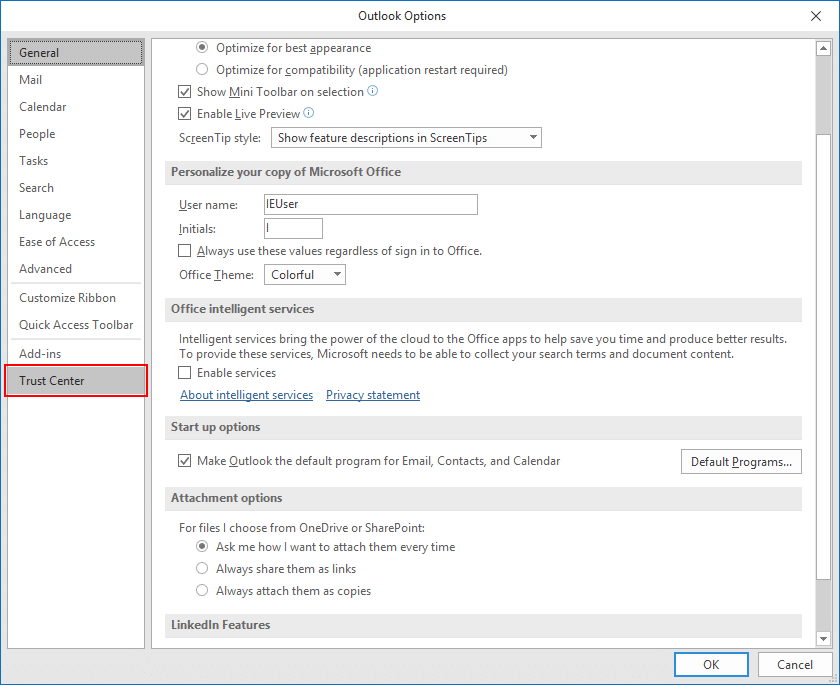
- Open Trust Center.
Select Trust Center at the bottom of the menu on the left side of the Outlook Options window.
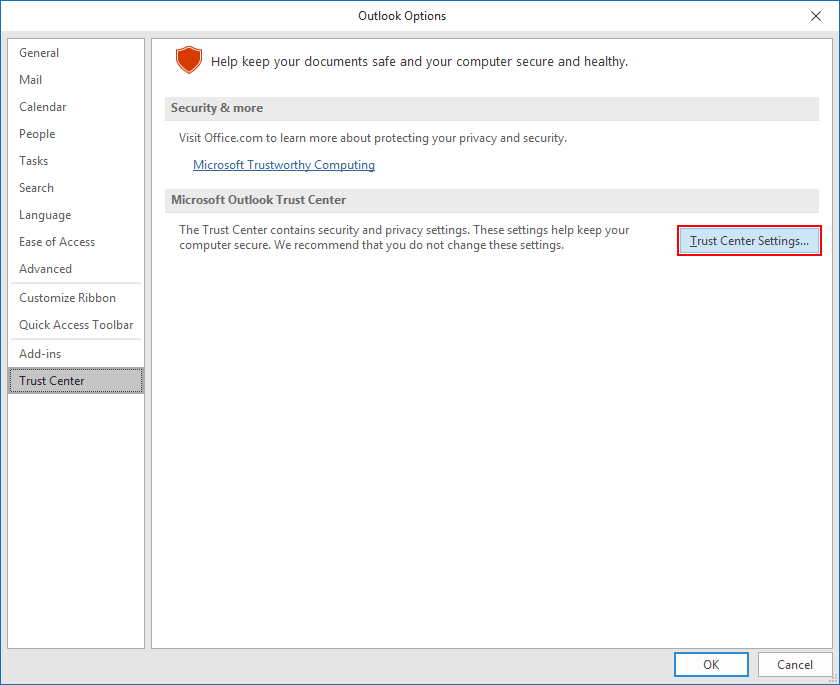
- Open Trust Center Settings.
Click the Trust Center Settings button.
- Select Email Security.
Select Email Security from the left-hand menu of the Trust Center window.
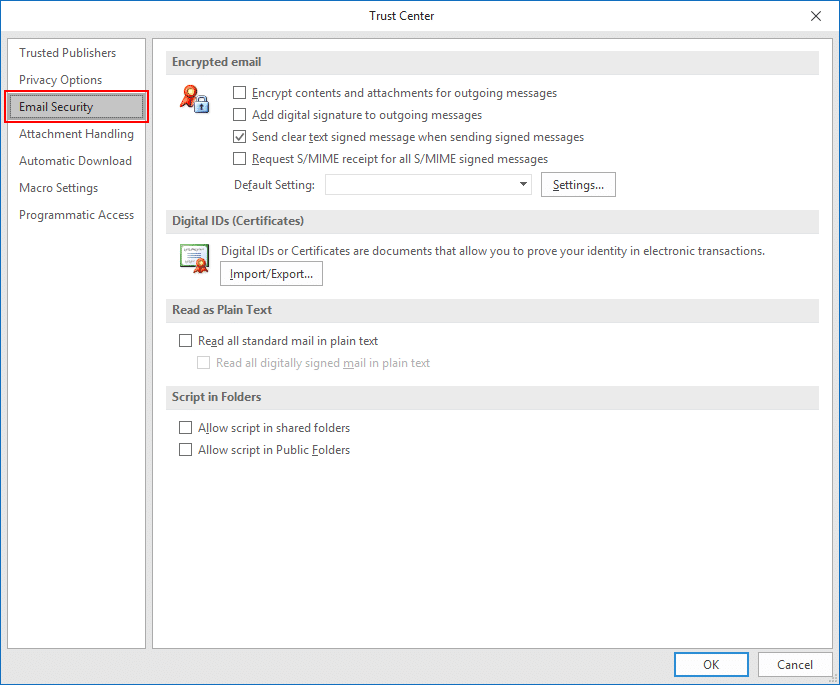
- Click Import/Export.
Click the Import/Export button, under Digital IDs (Certificates).

- Browse for file.
Make sure Import existing Digital ID from a file is checked, then click Browse…

- Open file.
Navigate to the PKCS#12 file, then click Open. The filename extension should be
.p12.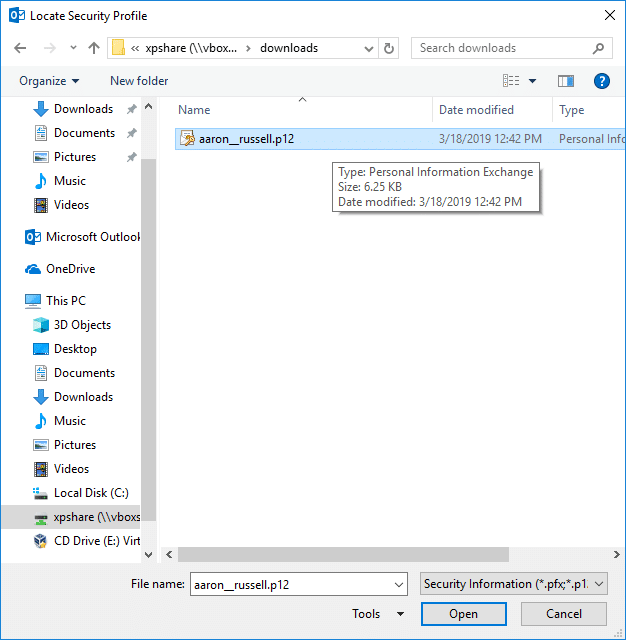
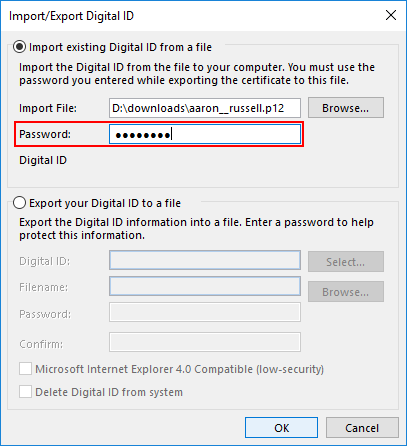
- Enter PKCS#12 password.
Enter the password you used when downloading the PKCS#12 file, then click OK.
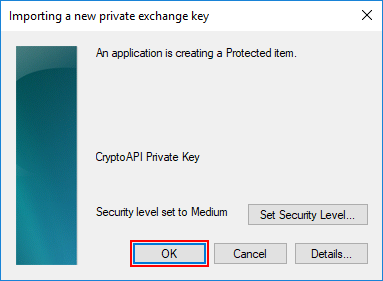
- Click OK.
Click OK on the security dialog box that pops up.
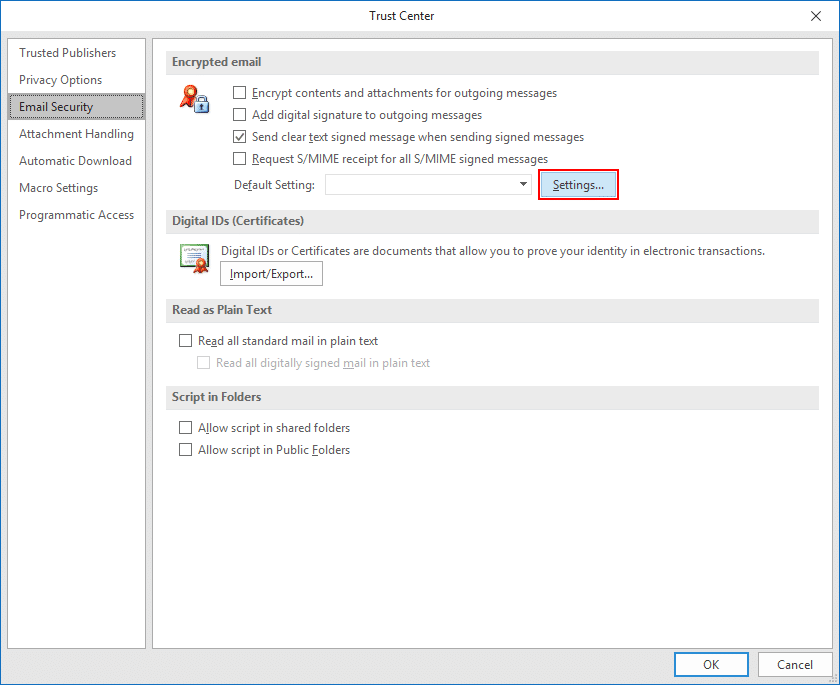
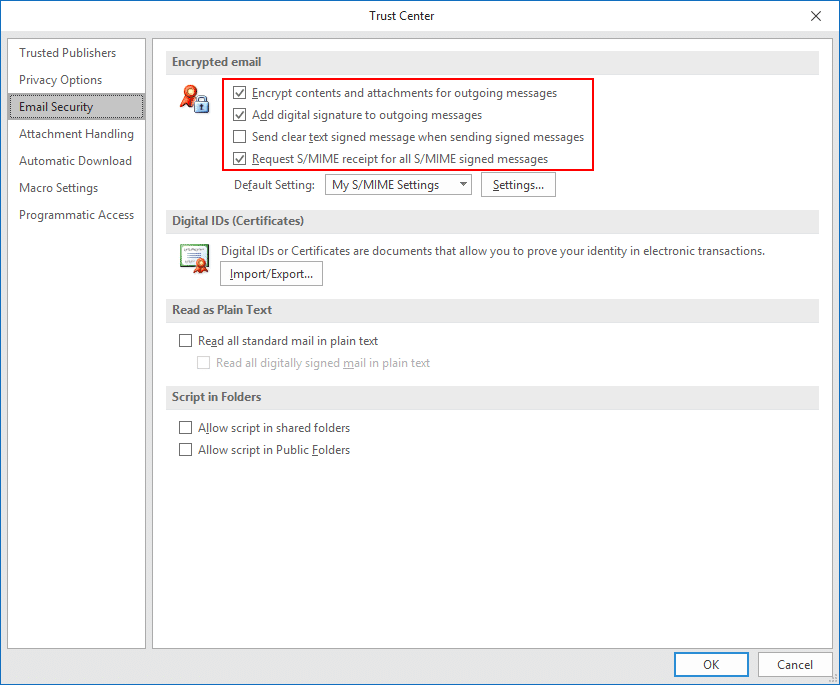
- Open encrypted email settings.
Click the Settings button, under Encrypted email.
- Name security settings.
Enter a name for your security settings.
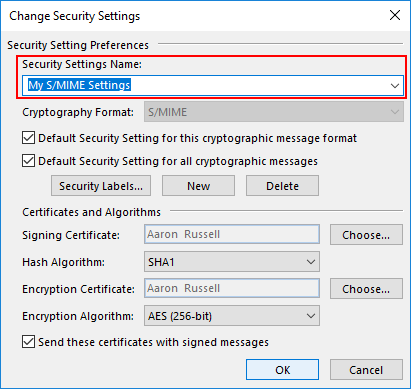
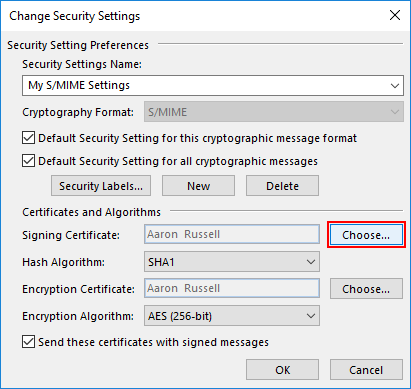
- Choose signing certificate.
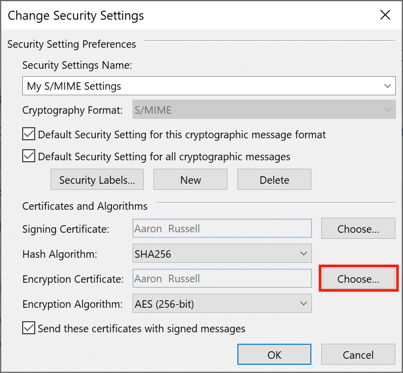
Click Choose, next to Signing Certificate.
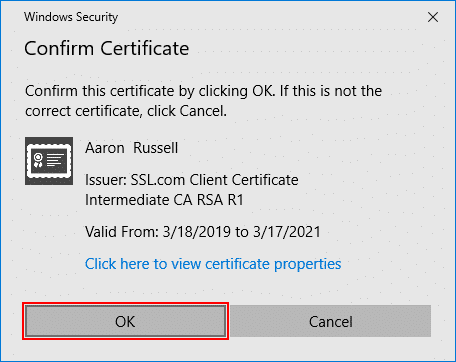
- Confirm or select certificate.
If you have only installed one certificate (as shown here), you can click OK on the Confirm Certificate dialog box that pops up. Otherwise, you will have to choose one from a list of installed certificates.
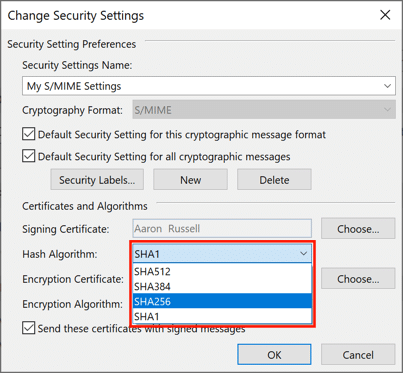
- Set hash algorithm.
Set the Hash Algorithm to SHA256.
- Choose encryption certificate.
Click Choose, next to Encryption Certificate, and click OK on the Confirm Certificate dialog box. Again, if you have more than one certificate, select the same one you chose for Signing Certificate.
- Close window.
Click OK to close the Change Security Settings window.
- Set S/MIME defaults.
Set your desired default options for S/MIME email via the four checkboxes under Encrypted email, then click OK to close the Trust Center Window.
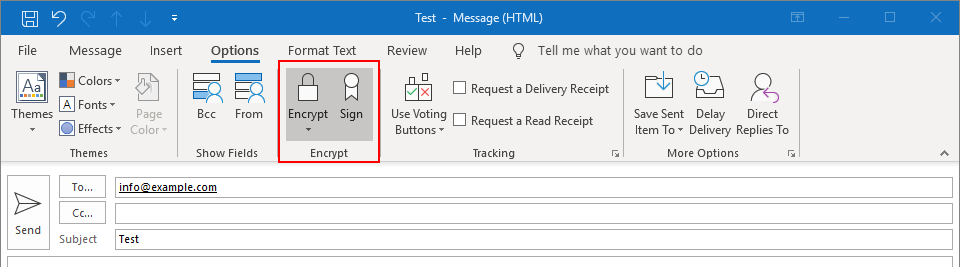
- Set S/MIME options in a new message.
Now that your S/MIME certificate is installed and configured, you can start sending signed and encrypted messages. Begin by creating a new email message in Outlook. Under Options, you can toggle the encryption and/or digital signature settings for the message.
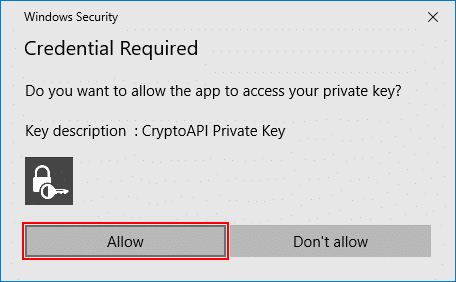
- Allow Outlook to use your private key.
After sending, click Allow in the Windows Security dialog box that appears, allowing Outlook to use your private key.
- Potential problem with encryption.
Note that if you attempt to send encrypted email and do not have your recipient’s public key, you will get an error message giving the option to send the message unencrypted. You can solve this issue by having them send you a signed email message, then adding them as a contact in Outlook.

- Confirm signature.
When your contact sends you a signed email, you should see a small ribbon icon in the upper right corner of the message. You can confirm the certificate’s details by clicking the icon.

- Add contact (step 1).
Right-click the sender’s name and select Add to Outlook Contacts.

- Add contact (step 2).
Click Save and Close to save your contact. You will now be able to send encrypted email to this recipient.


For more detailed information about S/MIME email, please see our article, Sending Secure Email with S/MIME. You can also check out our blog article, Business Email Compromise and S/MIME Certificates, which discusses the pervasive problem of email-based cyber attacks experienced by business owners and how our services offer strong protection against such threats.