Enable Two-Factor (2FA) Authentication
- Login to your SSL.com account.
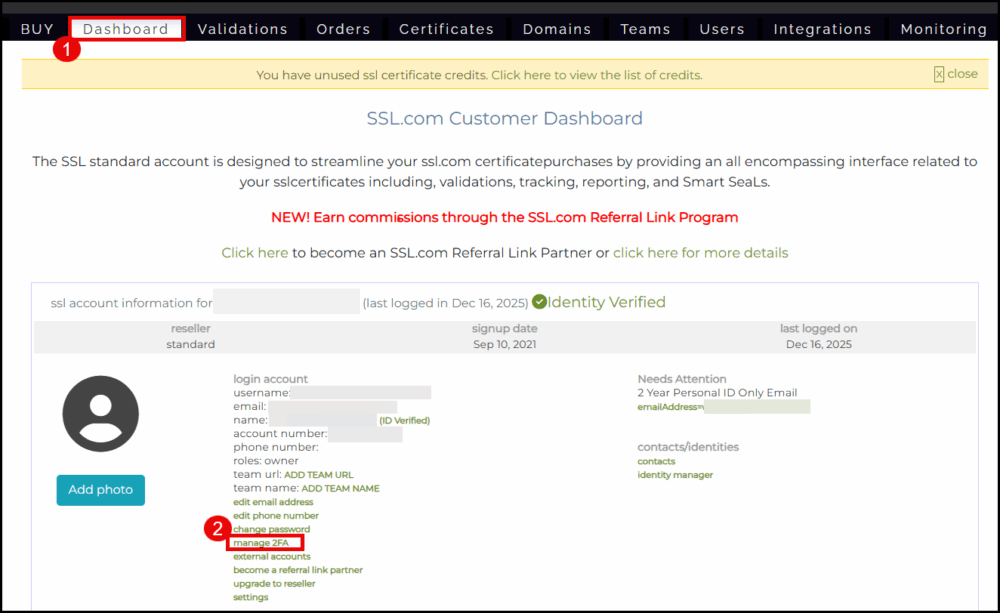
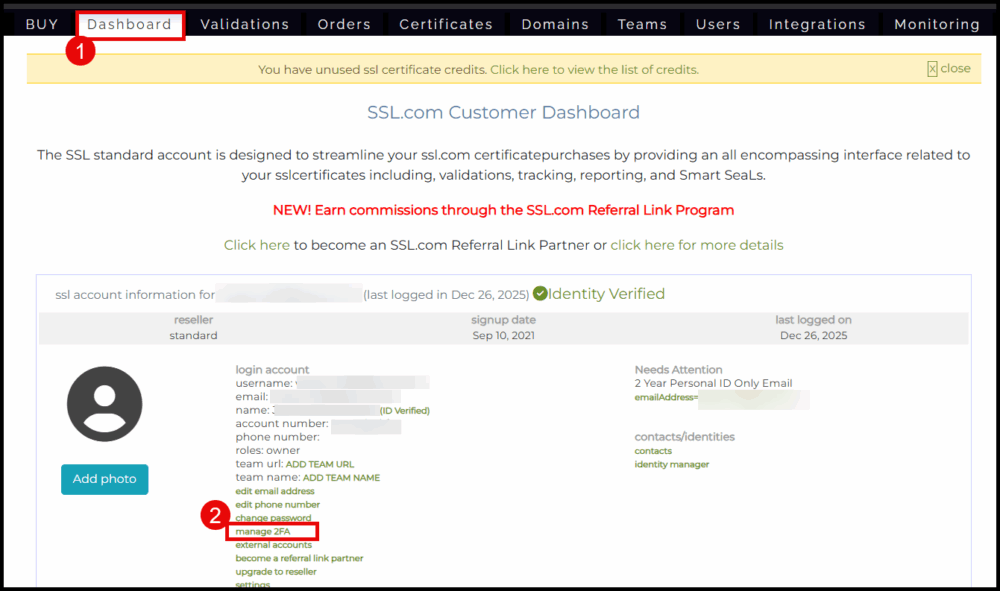
- Click Dashboard from the top menu, then scroll down and click manage 2FA.
- You will see the list of 2FA options. Choose which one to use by clicking the Enable button.
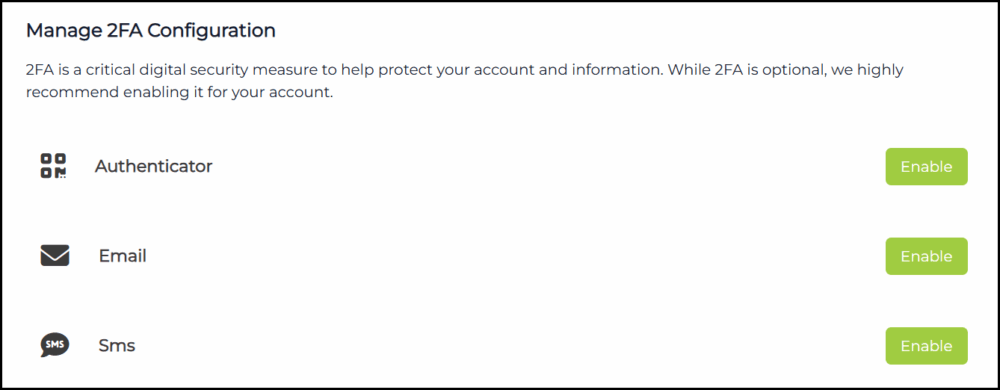


Authenticator App
Generates time-based, one-time codes on your smartphone or tablet. Popular apps include Google Authenticator and Microsoft Authenticator.- Click the Enable button for Authenticator.

- Open the authenticator app on your mobile phone and scan the QR Code. Once scanned, enter the 6 digit code from your authenticator app and then click the Enable button.
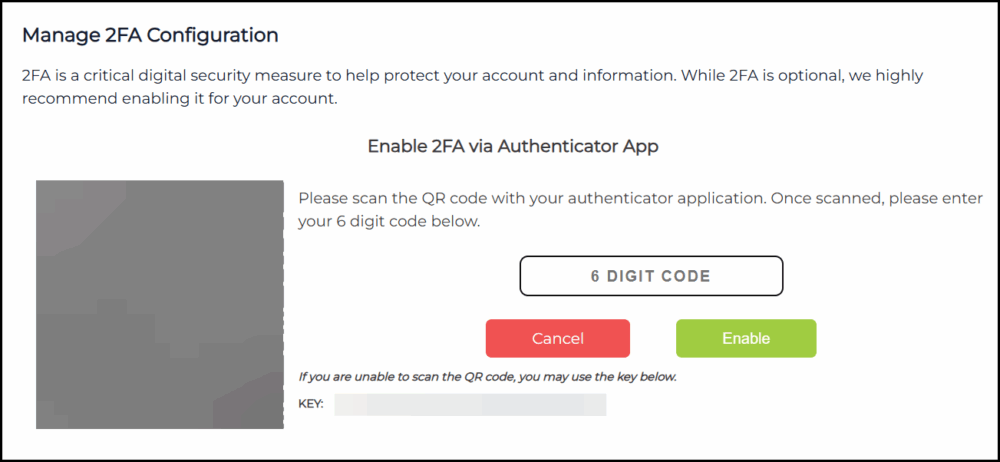
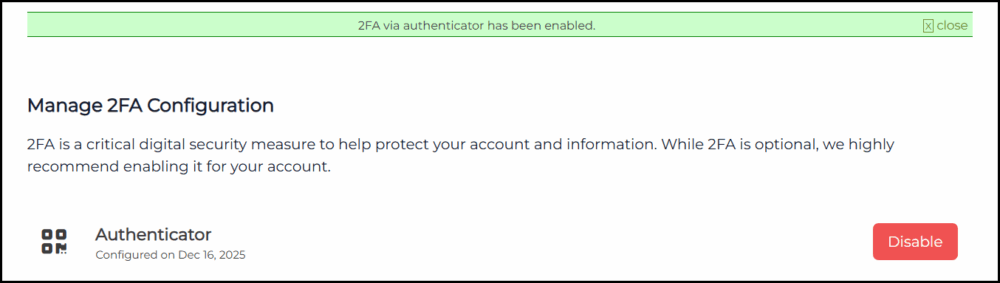
- 2FA through your authenticator app is now enabled.


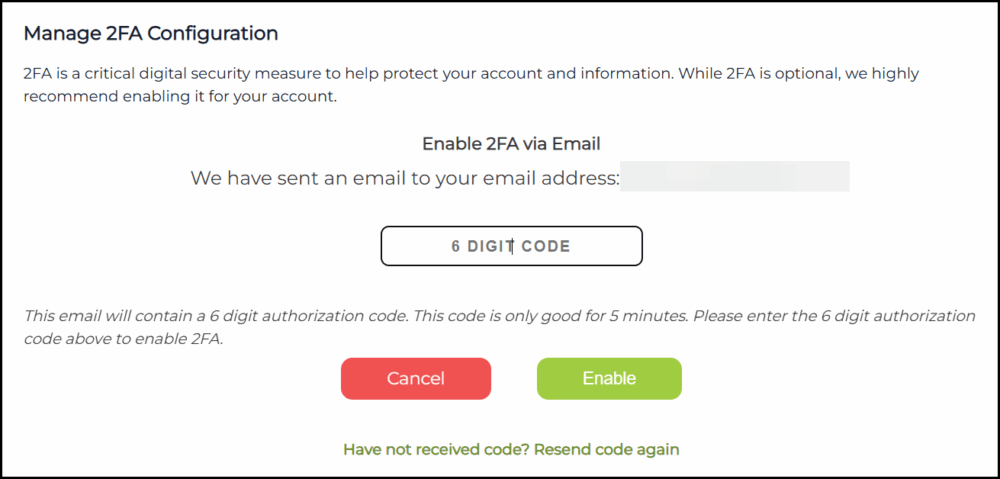
- Click the Enable button for Email.

- A verification code will be sent to your email address. Place the code in the box and then confirm by clicking the Enable button.
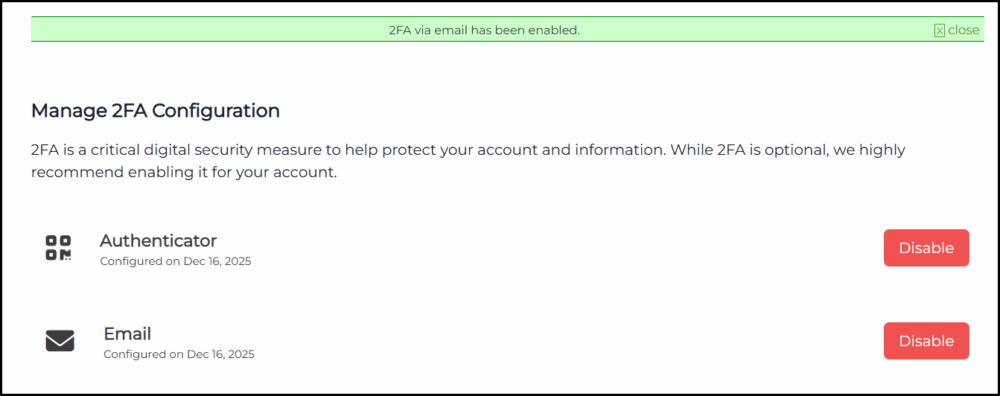
- 2FA using your email is now enabled.


SMS
Sends a verification code to your mobile phone via text message. This method provides quick access and is useful if you frequently need to log in on the go.Note: For some countries, the SMS method might not be available. In this case, use the Authenticator or Email option.
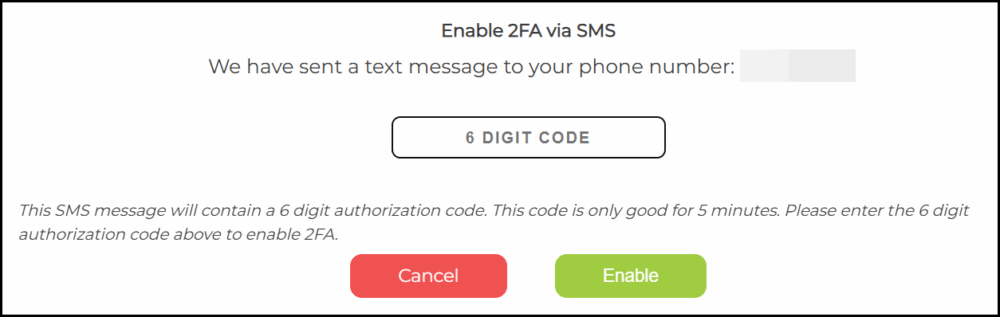
- Click the Enable button for SMS.

- Enter the SMS code sent to your phone number and then click the Enable button.
- 2FA through SMS is now enabled for your account.


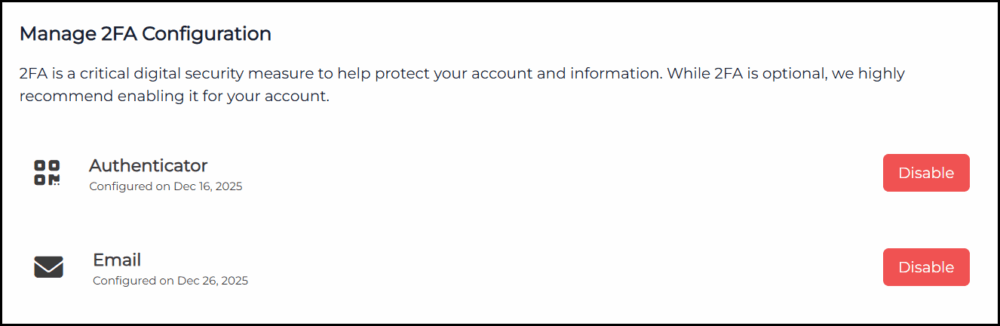
Disable Two-Factor (2FA) Authentication
- Click Dashboard followed by manage 2FA.
- Select which 2FA option you want to turn off. Click the Disable button to confirm.