This article will show you how to generate a Certificate Signing Request (CSR) in Microsoft’s Internet Information Server (IIS) 6. (The same steps will work if you are using IIS 5.) Note that you may need to create a new website before generating your CSR.
-
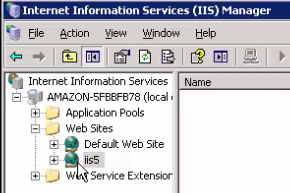
In your IIS Manager, navigate to the “Web Sites” section and locate the site you wish to create the CSR for.
-
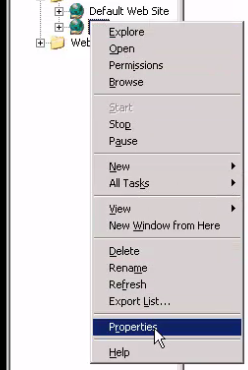
Right-click the globe icon for your site and select “Properties.”
-
In the “Properties” panel, click the “Directory Security” tab.
-
Click the “Server Certificate” button.
-
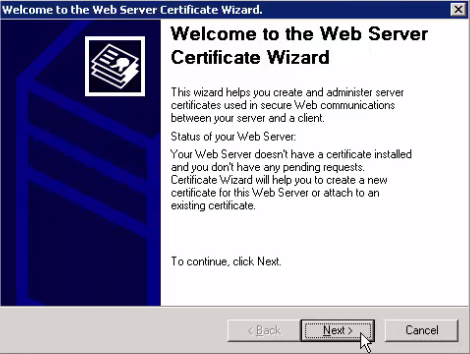
This will open the Web Server Certificate Wizard. Click “Next” to move past the welcome window.
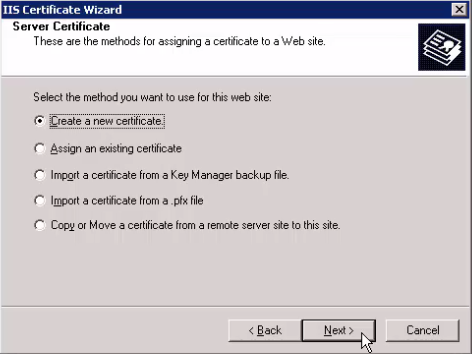
- Select “Create a new certificate” and click “Next.”
-
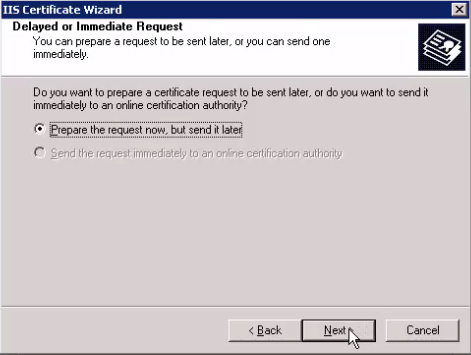
Select “Prepare the request now, but send it later.” Click “Next.”
-
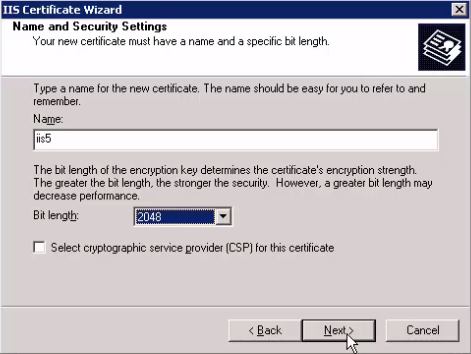
Enter a name for the new certificate. Make sure this is a unique name and one you can remember easily. SSL.com recommends setting the bit length to 2,048. Make sure the box next to “Select cryptographic service provider” is unchecked. Click “Next” to proceed.
-
Enter the name your business is legally registered under in the “Organization” field. Several fields can be used to identify the department or section, such as “Engineering”or “Human Resources.” Click “Next” when this information is entered.
The Organizational unit field will not be used in the actual certificate information. -
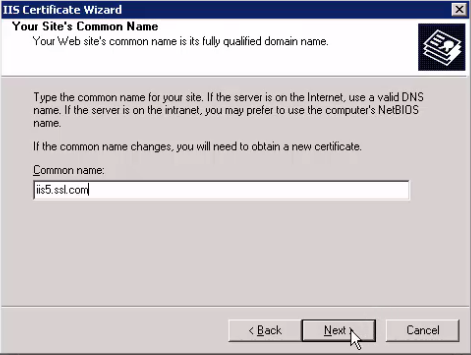
Enter the “Common name”for your site – this typically is identical to the domain name of the web site you wish to protect with this certificate. After you have entered the common name, click “Next.”
-
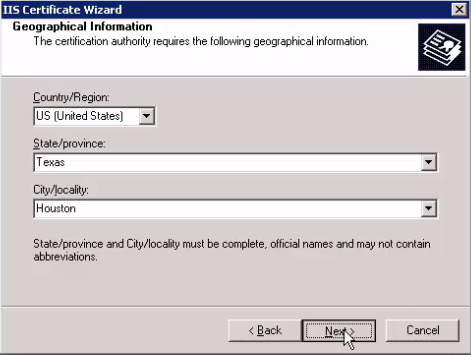
Enter the Geographical Information for your company. Note that the name of the state must be spelled out, not abbreviated. Click “Next” to continue.
-
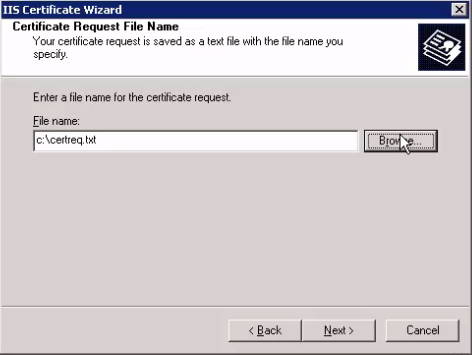
Now you will determine the name and location to save the CSR to. Your CSR will be saved as a text file. Click “Browse” and navigate to choose the folder you wish to save your CSR to.
-
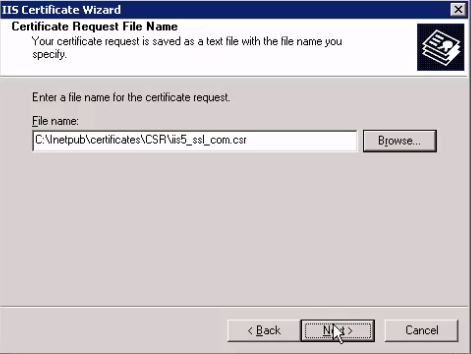
Make a note of the location where you save the CSR, and remember to use a unique name for this file which ends in dot CSR. (You should save as type “All files”, not as a dot TXT file.) When you are satisfied with your choices, click “Save.”
-
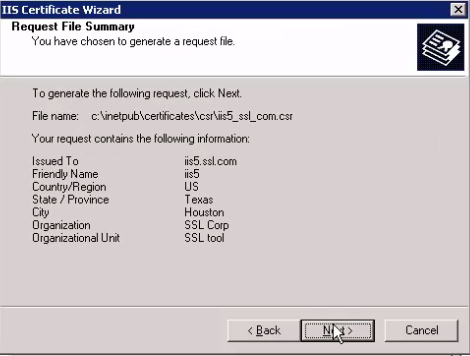
Review the information that will be incorporated into your CSR. If any changes are required, click “Back” to return to and edit the information. If the information looks good, click “Next” to generate the CSR.
-
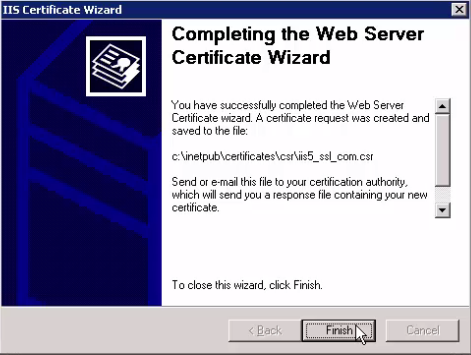
Your CSR is now created and saved to the location you designated. Click “Finish” to close the IIS Certificate Wizard.
Next Steps
For more information on installing your certificate in IIS 5 or 6, read here. For info on binding your certificate, read here.


