SSL.com wants you to be able to manage your own security architecture whenever possible, and thus presents here a method for disabling a root certificate in Windows using Microsoft Management Console (or MMC). Note that you may need to run MMC with Administrator privileges to follow the instructions below.
To Disable a Root Certificate with MMC:
Here’s how to disable a root certificate in Microsoft Management Console.
-
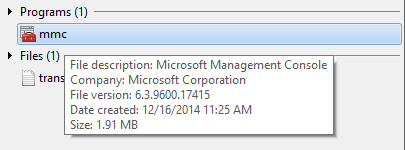
Open MMC by pressing the Windows key on your keyboard and then typing “MMC”…
…then hit Enter or double-click the icon to start the application.
-
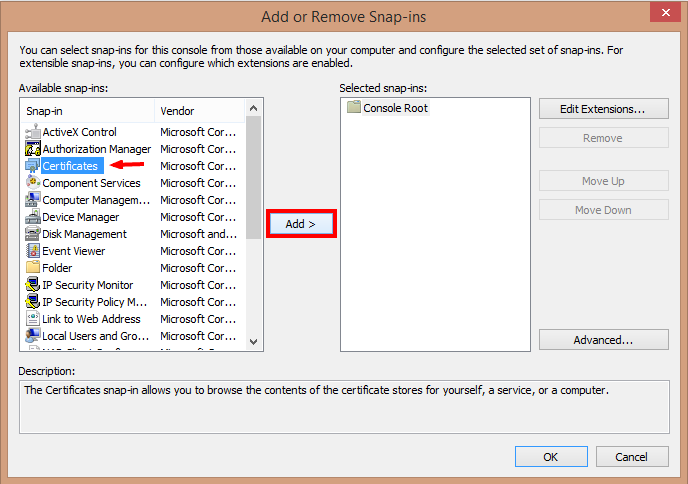
In MMC, select File > Add/Remove Snap-In (or type control-M).
- Add the “Certificates” Snap-In.
-
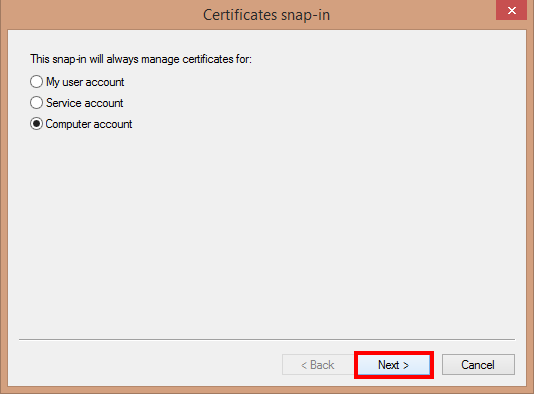
Select “Computer Account” and click the Next button…
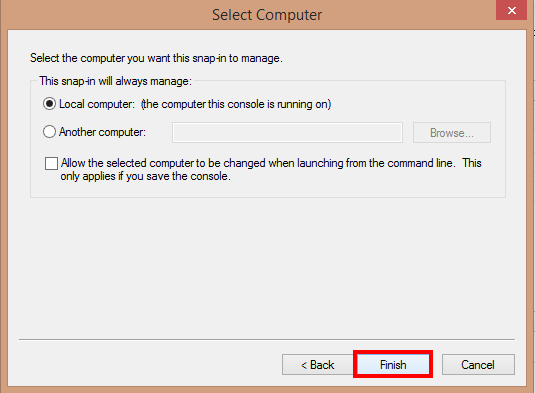
…then select “Local computer”, then the Finish button.
- Click OK to close the Add/Remove Snap-In wizard.
-
In MMC, click the arrow next to “Certificates (Local Computer)” to reveal the various certificate stores, then click the arrow next to your target certificate, and finally click the “Certificates” folder.
NOTE: In this example, we are disabling a self-signed certificate named “USERTrust RSA Certification Authority” in the root store, but the same steps can be used to disable the Superfish certificate – look for “Superfish” or “VisualDiscovery” in the target certificate. - In the list of certificates, look for your target entry (here, “USERTrust RSA Certification Authority”).
- Right-click the target entry and select “Properties” from the dropdown menu.
-
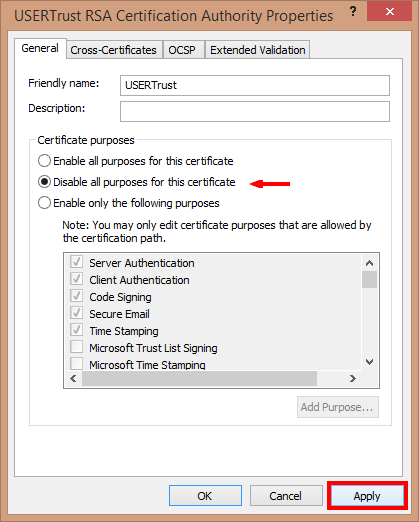
In the Properties panel, select “Disable all purposes for this certificate”, then click Apply to implement the changes and OK to close the panel.
- Now restart your Windows computer to have your changes take effect.


