
Effective since June 1, 2023, SSL.com has updated its key storage protocols for code signing certificates and retired the option to obtain code signing certificates in PFX format. This was enacted to comply with guidelines published by the Certificate Authority/Browser (CA/B) Forum, which requires that the private keys of code signing certificates be secured in encrypted devices (such as tokens), on-site FIPS-compliant hardware security modules (HSMs), or via cloud-based HSM services.
Among the supported cloud HSM options, Microsoft Azure Key Vault (Premium Tier) stands out as a robust choice for storing private keys and generating Certificate Signing Requests (CSRs).
To utilize Azure Key Vault (Premium Tier), users are required to create a Certificate Signing Request (CSR), which acts as an official submission for SSL.com to issue a code signing certificate. Before a CSR is used to issue a certificate, a Certificate Authority like SSL.com must verify that the private key will be the basis for the encryption used in the request and was created and safely stored on a certified device meeting FIPS 140-2 Level 2 (or above) standards, with protection against key export. This verification is performed through an attestation process, which can be conducted either by a qualified security officer designated by the registrant or through an attestation service provided by SSL.com.
The following sections provide instructions on how customers can generate a CSR and undergo the ceremony service conducted by SSL.com’s expert team.
SSL.com as Auditor
You may opt to have SSL.com act as the auditor for a fee. For further information, please contact SSL.com’s sales team via sales@ssl.com
Bring Your Own Auditor (BYOA)
Customers may select a qualified auditor to confirm the private keys were generated and stored on a compliant Hardware Security Module (HSM). This method is referred to as Bring Your Own Auditor (BYOA).
Prerequisites
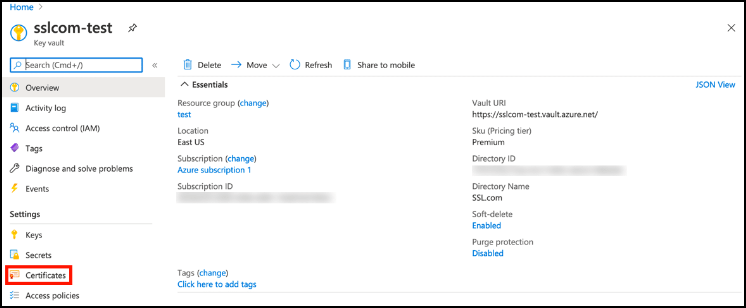
- An Azure Key Vault (Premium Tier). The Azure Key Vault service tier that should be used for this process is Premium because it is FIPS 140-2 Level 3 validated.
- For instructions on how to create an Azure Key Vault, please refer to the next section: Create an Azure Key Vault.
- If you already have an existing Azure Key Vault, please proceed to the other section: Generate a Certificate Signing Request in Azure Key Vault.
- A signing certificate order from SSL.com.
For a complete list of cloud HSMs that SSL.com supports for code signing, please refer to this article: Supported Cloud HSMs for Document Signing and Code Signing.
Create an Azure Key Vault
- Sign into the Azure portal.
- Click Create a resource.
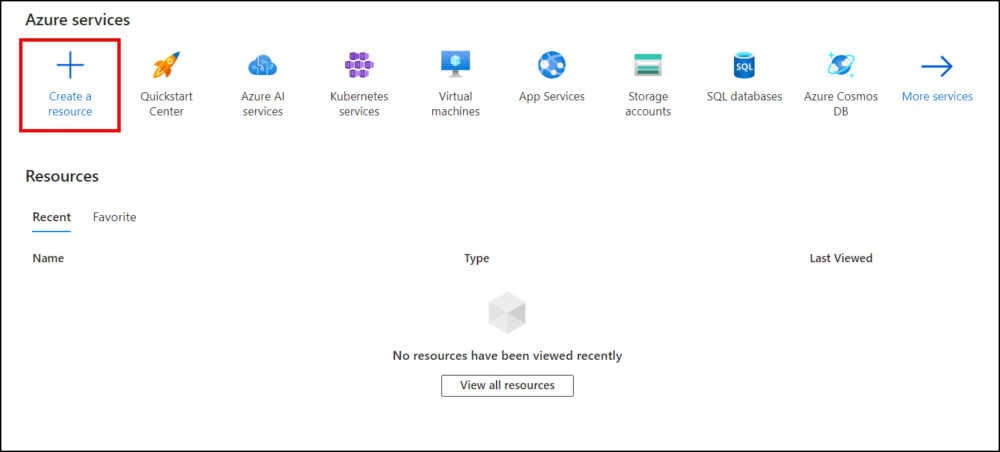
- Scroll to Key Vault and click the Create link.

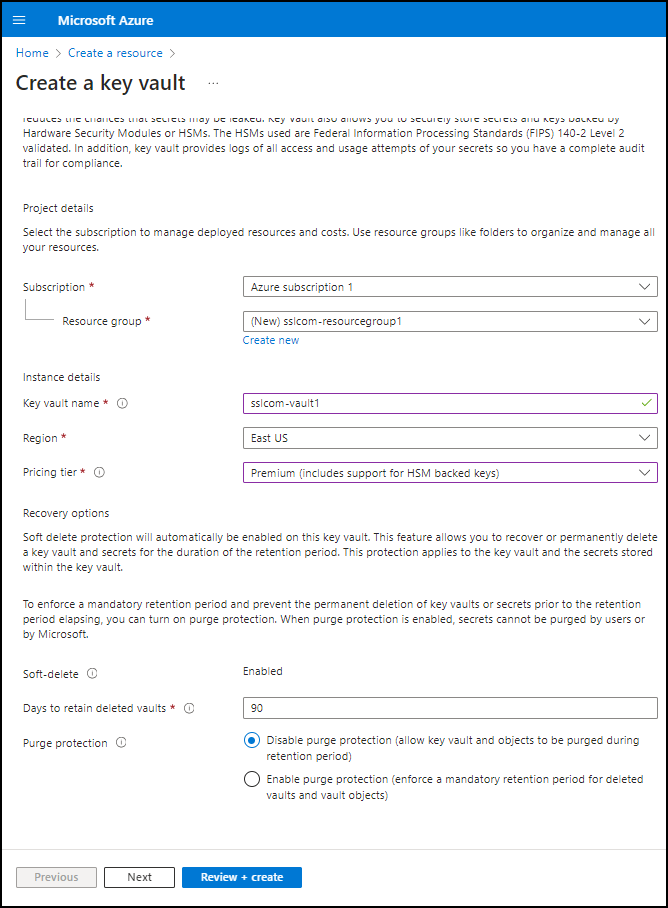
- Under the Basics section, perform the following.
- Select the subscription and resource group. If needed, you can create a new resource group by clicking Create new.
- Assign a name and region. Provide a name for your Key Vault and choose a region.
- Opt for the Premium pricing tier. To comply with the FIPS 140-2 standard, select the “Premium” pricing tier.
- Configure recovery options. Set the recovery options for your Key Vault, including purge protection and the retention period for deleted vaults.
- Click the Next button to proceed to the Access Configuration Settings section.
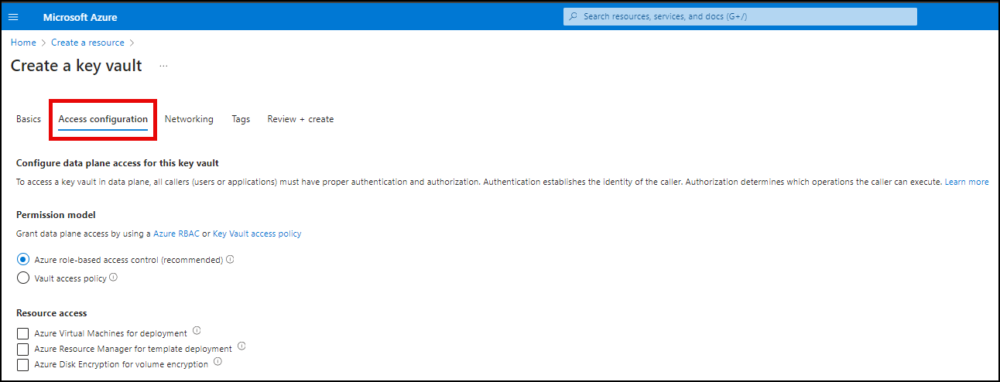
- Click Access configuration. Set the access policies for your Key Vault.
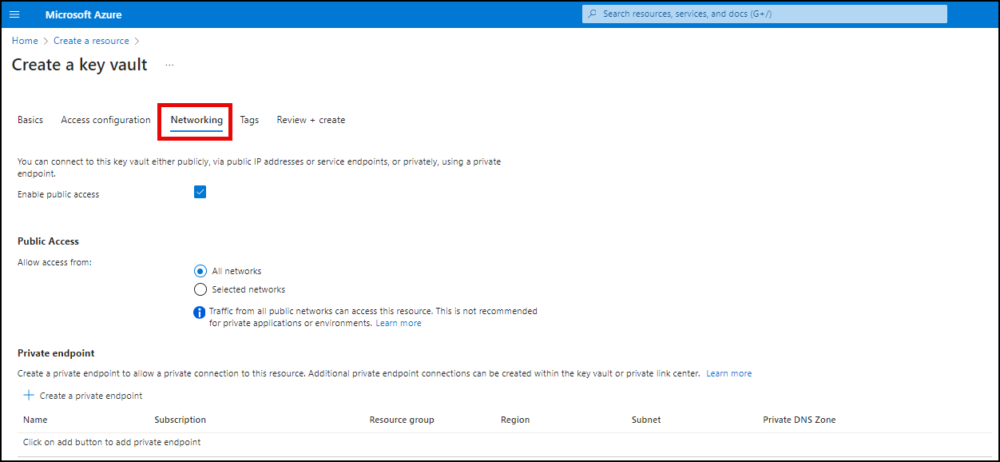
- Click Networking. Choose a connectivity method for your Key Vault.
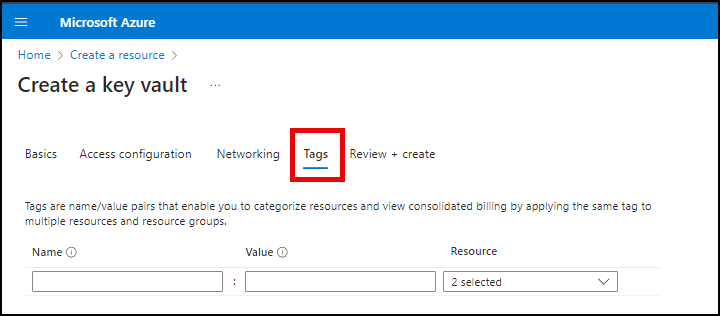
- Click Tags. If desired, create tags for your Key Vault.
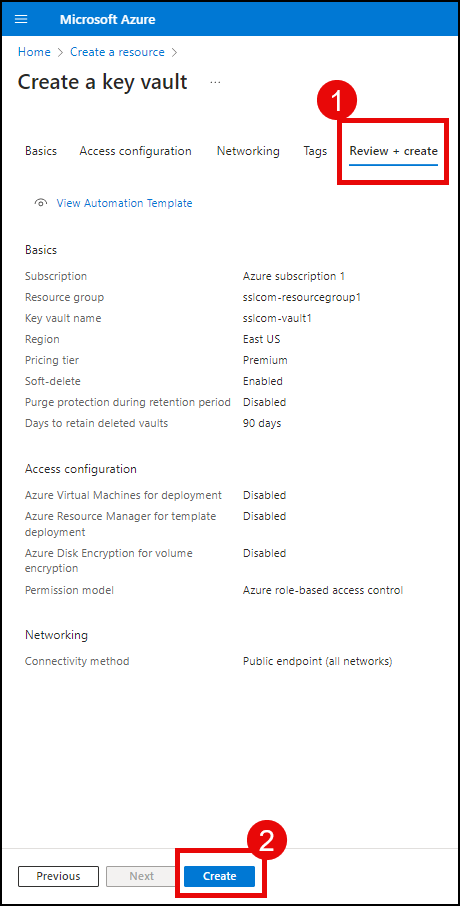
- Continue to Review + create. Review your settings, then click the Create button to create your new Key Vault.
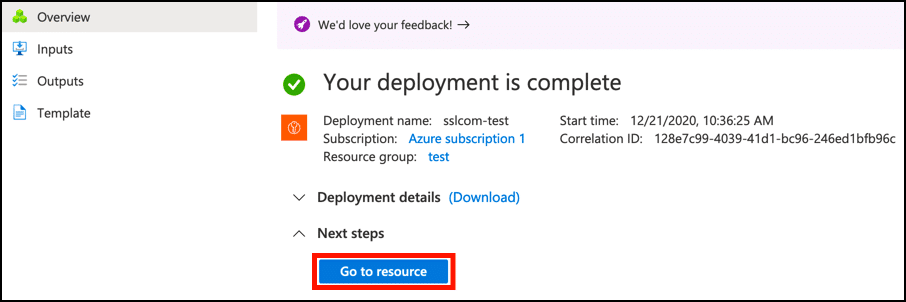
- Azure will then create your new Key Vault. Once it is ready, you can access it by clicking the Go to resource button.
Generate a Certificate Signing Request in Azure Key Vault
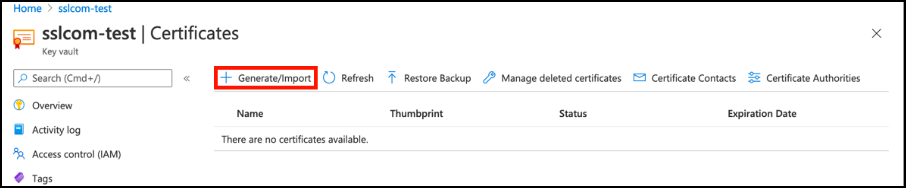
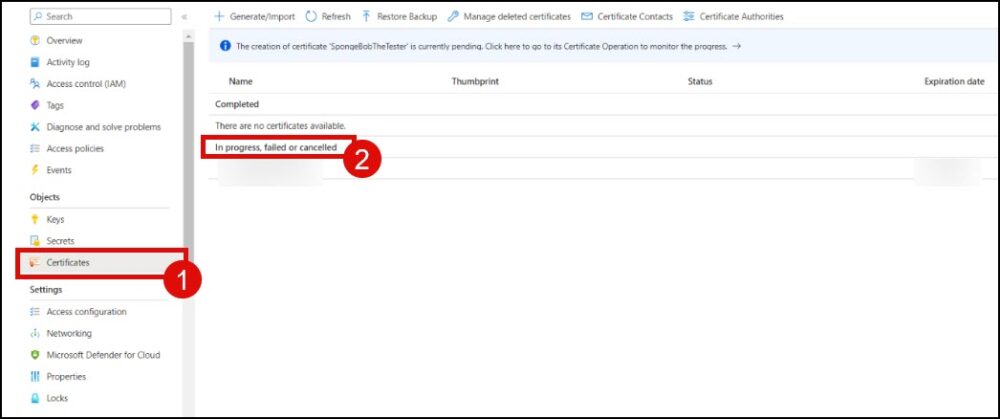
- Select your key vault and click Certificates.
- Click the Generate/Import button to open the Create a certificate window.
- Accomplish the following fields:
- Method of Certificate Creation: Select “Generate.”
- Certificate Name: Enter a unique name for your certificate.
- Type of Certificate Authority (CA): Choose “Certificate issued by a non-integrated CA.”
- Subject: Provide the X.509 Distinguished Name for your certificate.
- Validity Period: You can leave this set to the default of 12 months. For code signing certificates with longer validity periods, the issued certificate will match your order, not the CSR.
- Content Type: Select “PEM.”
- Lifetime Action Type: Configure Azure to send email alerts based on a certain percentage of the certificate’s lifetime or a specific number of days before expiration.
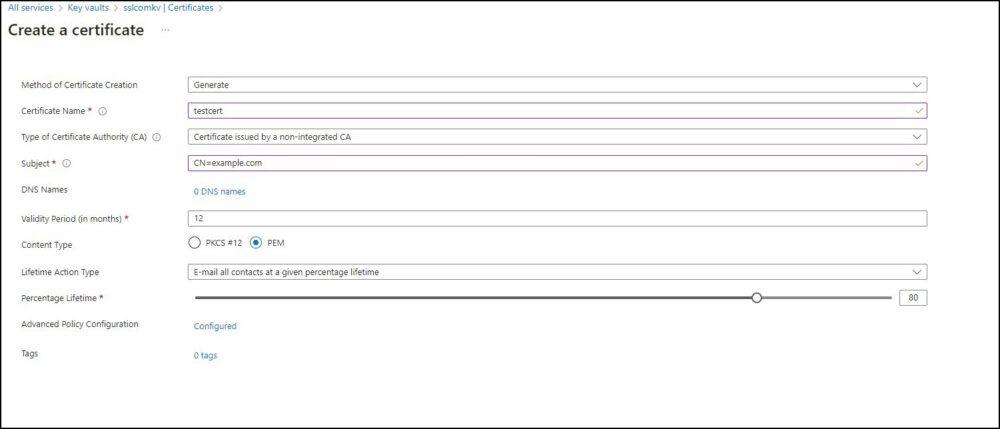
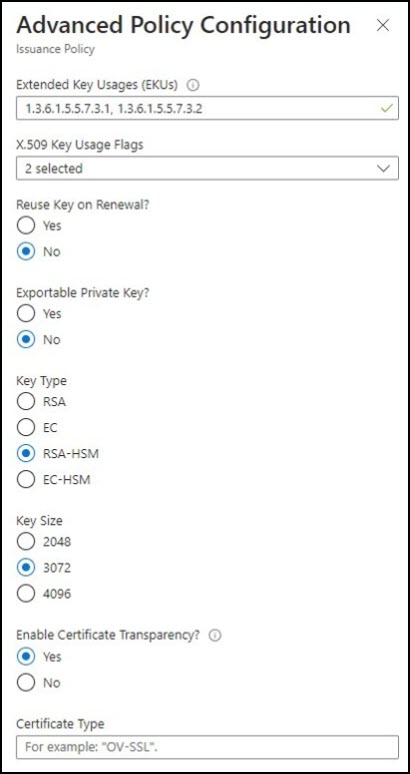
- Advanced Policy Configuration. Click Advanced Policy Configuration to set the key size, type, and policies for key reuse and exportability.
- For certificates issued by SSL.com, you can leave Extended Key Usages (EKUs), X.509 Key Usage Flags, and Enable Certificate Transparency at their default values.
- Reuse Key on Renewal? Select No.
- Exportable Private Key? Select No.
- Key Type. Select RSA+HSM
- Key Size. For a code signing certificate, you can only choose between 3072 or 4096.
- When you are finished setting the Advanced Policy Configuration, click the OK button, followed by Create.

- On the Certificates section, locate your certificate in the list of in progress, failed or canceled certificates and click it.
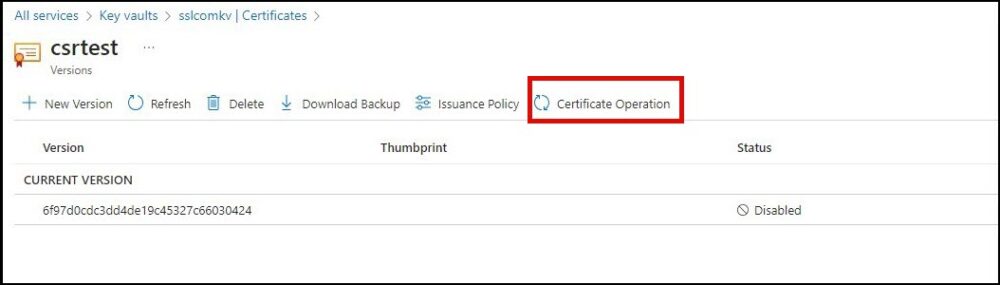
- Click Certificate Operation.
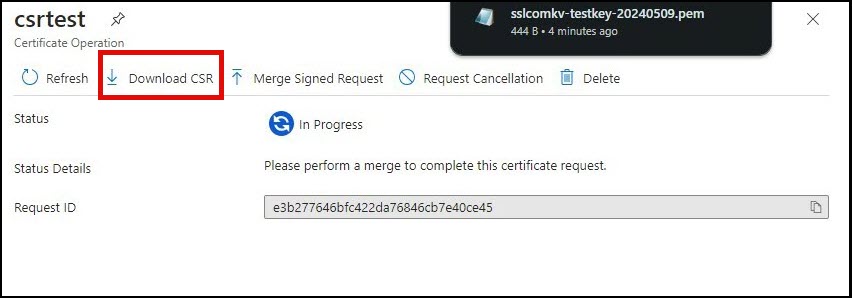
- Click Download CSR and save the file in a secure location.
Submit the CSR to SSL.com and Undergo Attestation
Once you’ve generated your key pair and Certificate Signing Request (CSR), the next essential step is attestation. Before SSL.com can issue a code signing certificate, we must verify that your private key was generated and is securely stored on a FIPS 140-2 Level 2 (or higher) certified device with non-exportable key protection. For customers using Azure Key Vault Premium Tier, there are two attestation options:SSL.com as Auditor
You may opt to have SSL.com act as the auditor for a fee. For further information, please contact SSL.com’s sales team via sales@ssl.com
Bring Your Own Auditor (BYOA)
Customers may select a qualified auditor to confirm the private keys were generated and stored on a compliant Hardware Security Module (HSM). This method is referred to as Bring Your Own Auditor (BYOA).